Toyota's Prado 150 is a great touring vehicle option. Fitted with enough comfort and features to make long trips pleasant, without going overboard on fancy tech and compromising reliability, and with an OEM 63L auxiliary fuel tank available to increase your fuel capacity to 150L, as well as boasting proper off-road capability, the Prado 150 can get you just about anywhere you want to explore.
There is one major gripe with the 150 for anyone looking to build a tourer though... The 3rd row seats.
While the base GX model is available in a 5-seater with a "full" size boot, The GXL, VX, and Kakadu are all 7-seaters, with 2 fold-down seats built into the boot. This is great if you're a family of 6-7 bopping around town, but for touring and off-roading these seats may as well be a slab of plastic and metal permanently sitting on your boot floor, taking up precious space and adding weight, eating into your limited GVM.
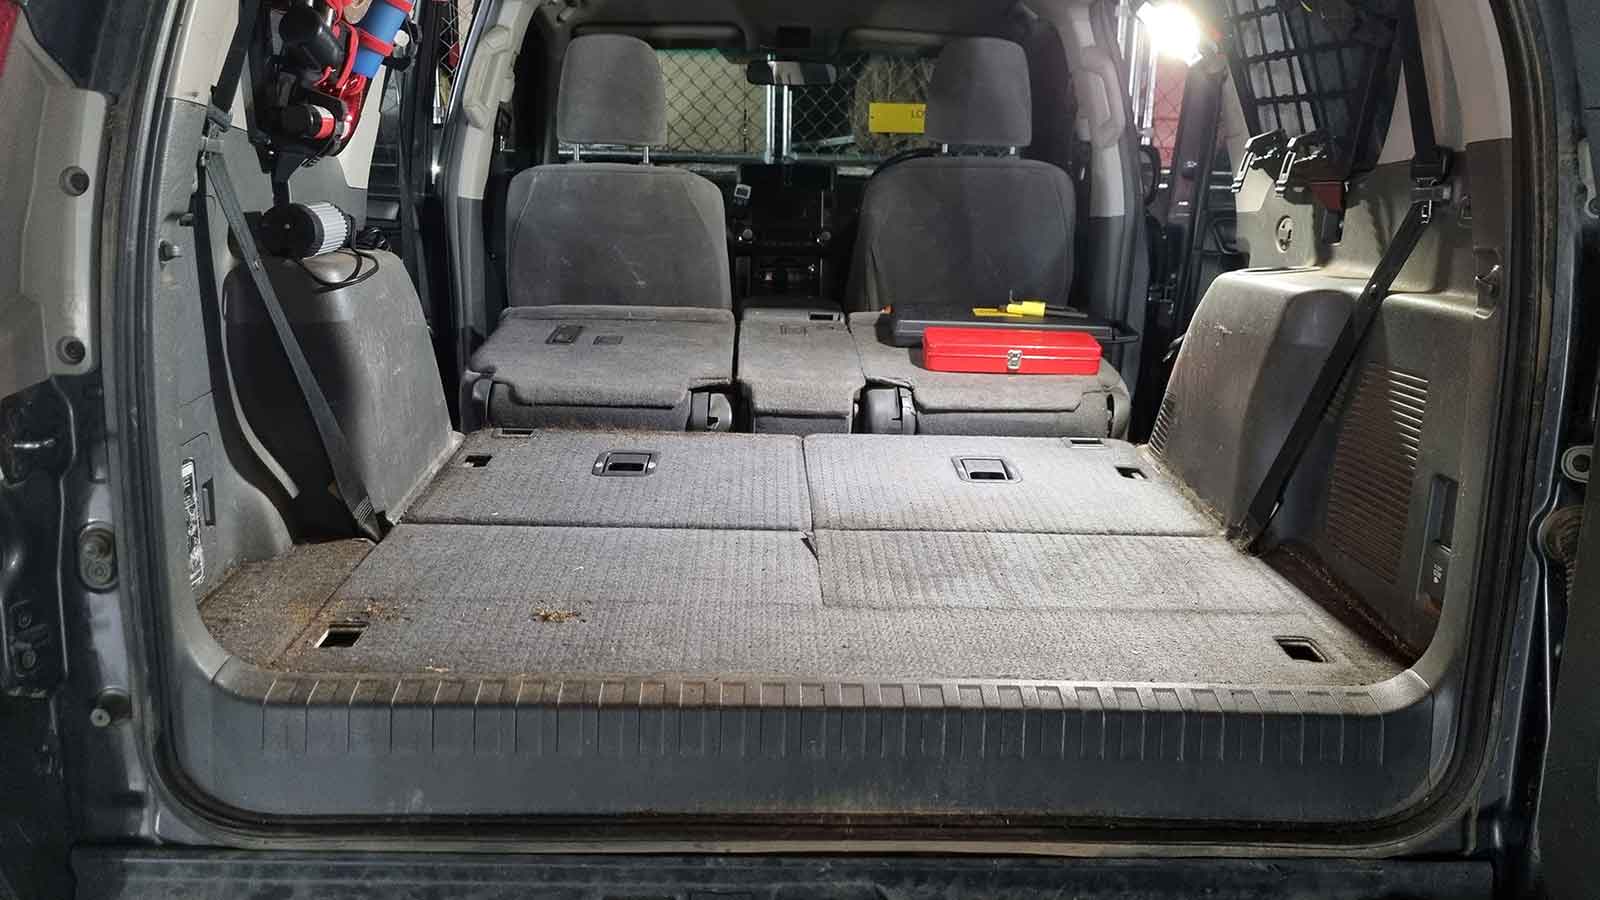
Above, you're looking at the factory GXL boot with the second-row rear seats folded down. As you can see, the boot's floor is not flush with the bottom of the door opening. That 12cm high slab at the rear is the folded-down third-row seats.
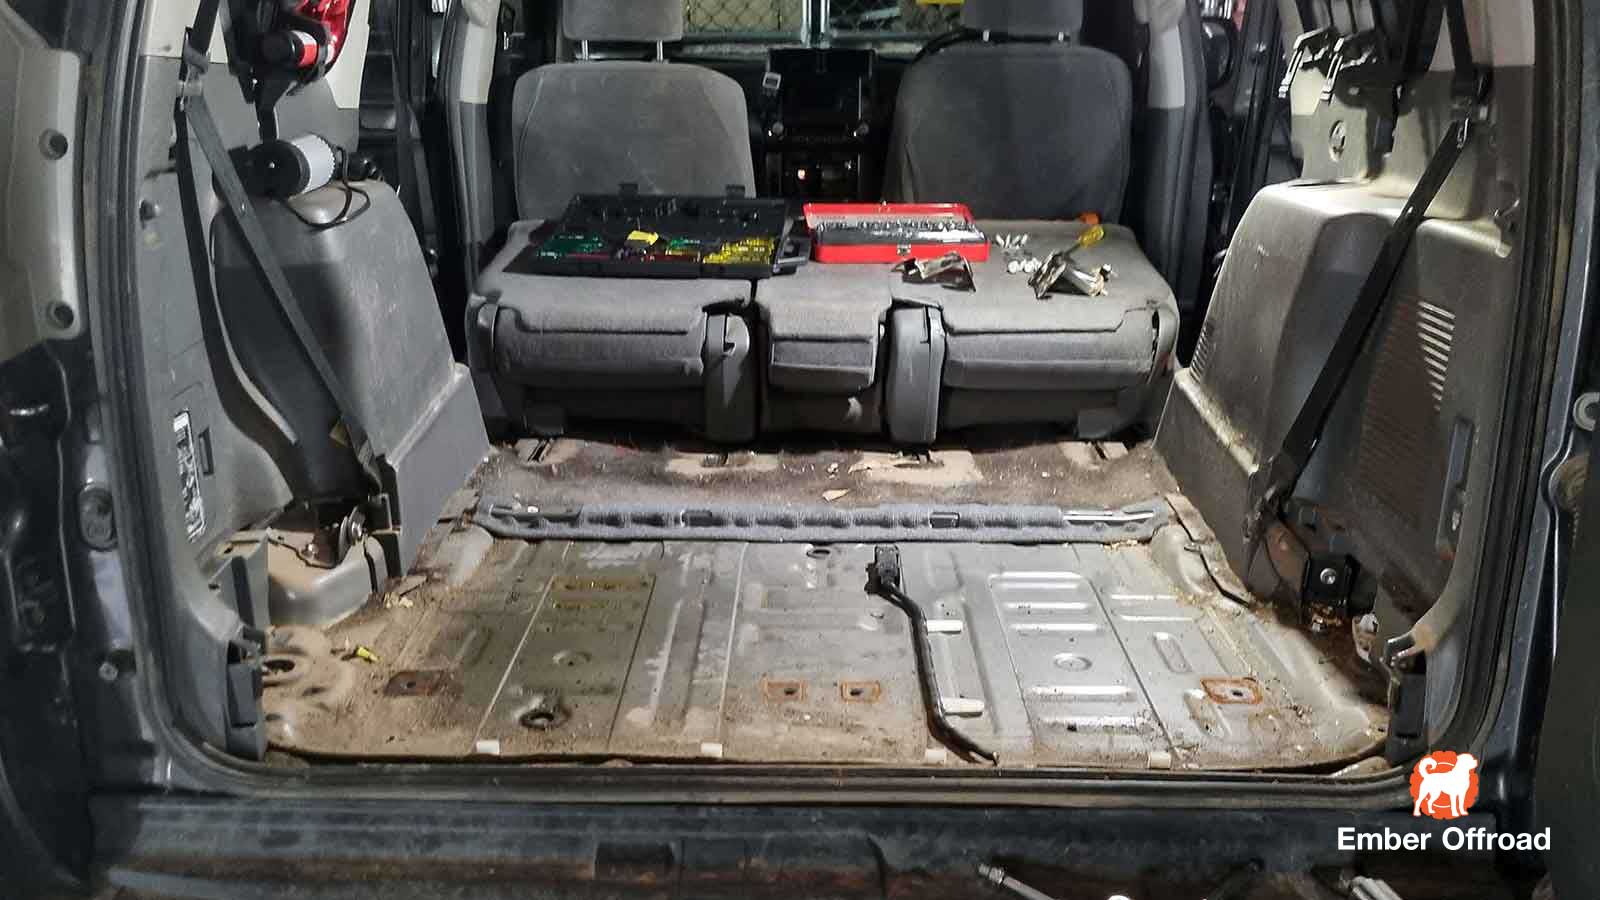
Compare this to the photo below with the 3rd-row seats removed:
As you can see, it's a world of difference. By removing the 3rd-row seats from the boot, you're freeing up roughly 110L of additional storage space. You're also shedding about 40kg of weight which, before removal, you've been pointlessly lugging around on every drive.
An obvious replacement to fill the now available space is a drawer system, and while there's a lot to like about the convenience of drawers they're not without their downsides. A quality drawer system can cost you anywhere in the $1,500 - $2,000 neighborhood; not a trivial amount if you're working on a budget.
Arguably the more significant issue is weight. The Prado 150 GXL has a payload of 685kg (may vary depending on your region), with some drawer systems weighing as much as 80kg, this is a huge chunk of weight sacrificed to provide some storage convenience.
685kg may sound like a lot for anyone building a 4WD touring setup for the first time, but that capacity evaporates in the blink of an eye.
Add a bull bar, winch, roof racks, auxiliary battery, fridge, and a pair of jerry cans - all pretty typical for a standard touring setup - and you've already used about 250kg of your cargo capacity before anyone is even sitting in the truck.
Recovery gear, that's another 30kg gone. Underbody protection, that's 40kg gone. An air compressor, chainsaw, solar power setup, chairs, table, etc., all this is another 100kg and you're still not sitting in the truck yourself. Every bit adds up, and 685kg arrives fast.
You can, of course, get a GVM upgrade for most 4WDs; in the case of the Prado, this adds an additional 510kg of payload with most kits. This is a huge increase, but a GVM upgrade will cost you several thousand dollars, so isn't a justifying option for everyone. If you're towing a heavy caravan or need hundreds of additional kg capacity, then a GVM upgrade is unavoidable to keep things legal, but it's a particularly frustrating investment if you're only exceeding GVM by 50kg. This is where stripping a bit of weight can be the better solution.
With all that in mind, I went for a simpler storage solution in my Prado build.
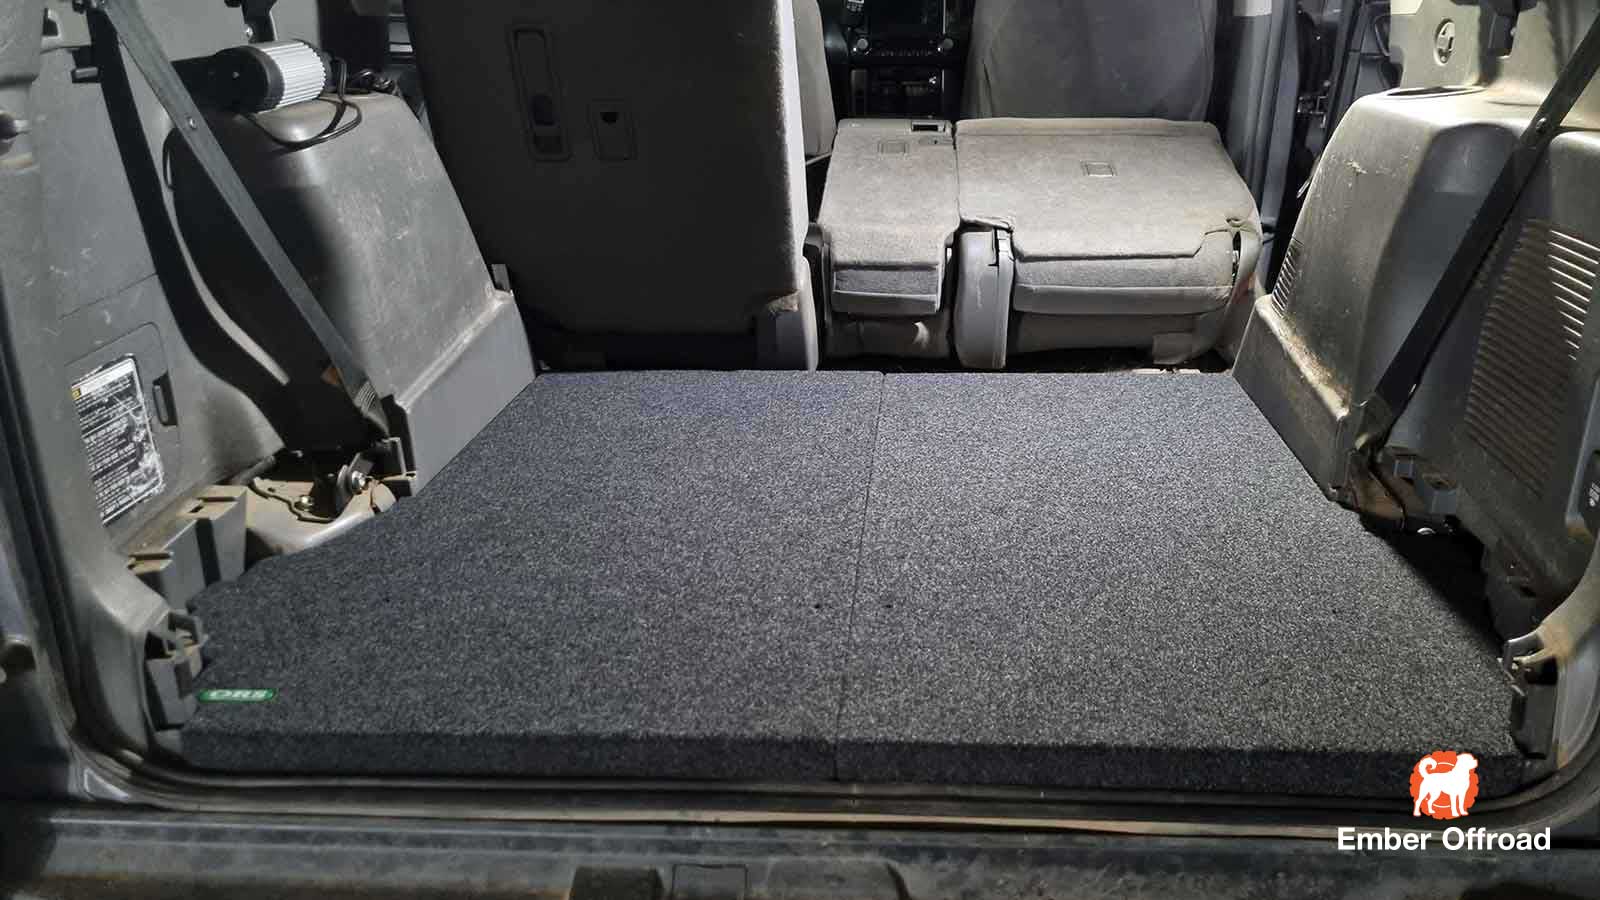
Above: a pre-made false floor to make the starting point easy.
This particular floor is from Off Road Systems in Sydney, but wherever you are there will be someone making an equivalent product for you. The above build was done a few years ago, but from memory, the floor was about $400 AUD.
It took 10 minutes to install the false floor once the 3rd-row seats were removed; the 2 halves simply drop into place, screw in a few bolts through pre-drilled holes into the factory mounting points and you're done. In my opinion, money well spent and a huge time saver compared to fussing around trying to DIY out of marine ply with a jigsaw.
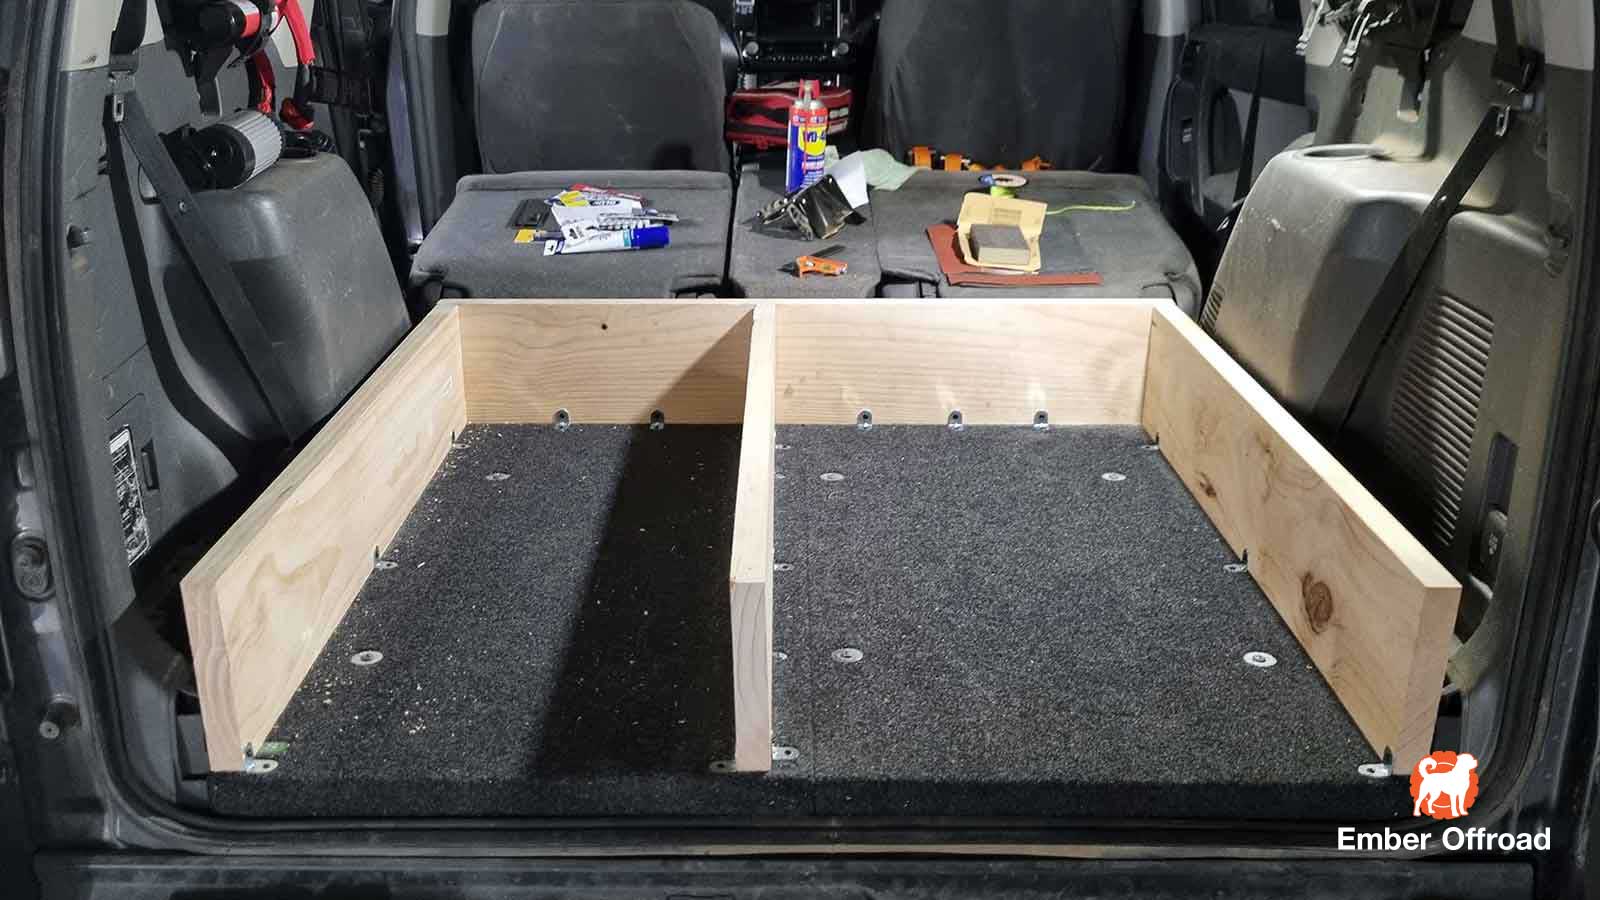
A few slabs of structural hardwood cut to size, and L brackets to secure the vertical supports to the false floors.
Beneath the carpet, the floor is marine ply. Simply using timber screws here to secure both parts.
The amount of timber you need for the verticles can be picked up from your local hardware store for 10's of dollars. A packet of the L brackets costs about the same.
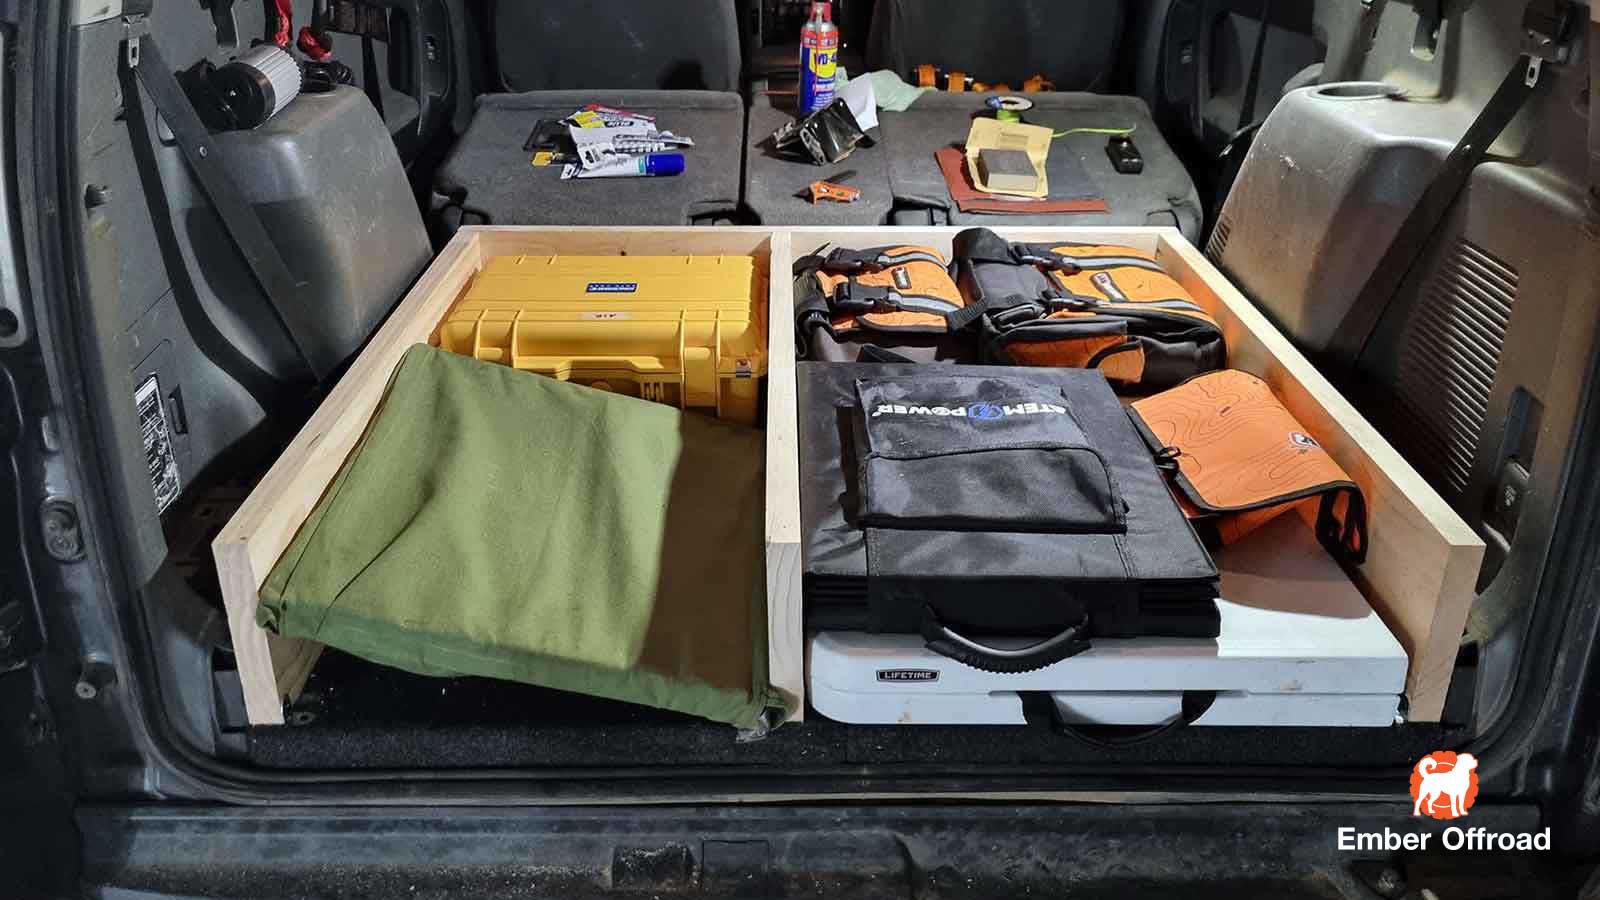
Above, a test pack to see how everything fits.
An additional benefit of a simple system like this you'll notice over a drawer system is the ability to set different widths between the compartments. Any twin-drawer system you get will have drawers of equal widths; if that were the case here I wouldn't be able to fit my folding table you see at the bottom-right. My winch recovery and snatch recovery gear backs at the rear-right also couldn't fit side-by-side, and would have had to go in some other orientation resulting in wasted space.
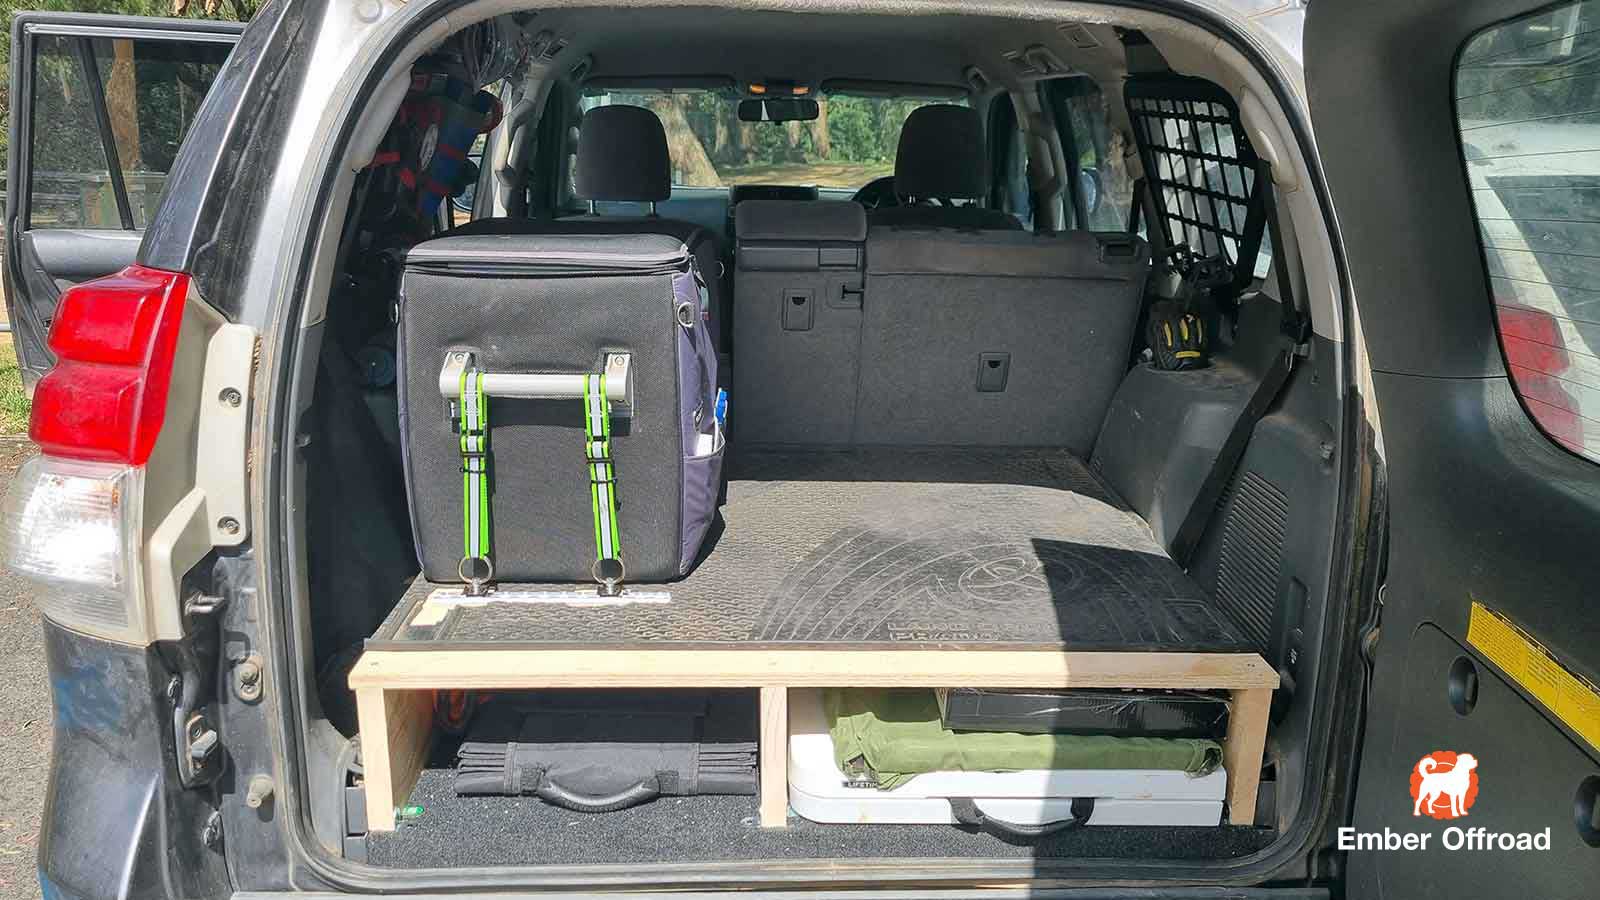
With the ability to position the center divider where I wanted, I was able to fit everything perfectly. Then it's just a matter of placing the marine ply top and screwing it down, and voilà...
The previously wasted space of the 3rd row seats has now been reclaimed for custom-sized storage. Pop a pair of anchor tracks on the left, and the fridge is secured, all while still having plenty of room on the right for the dog.
When everything that came out, and everything that replaced it was tallied up, I ended up with about 100L of additional storage, and shed 36kg of unnecessary weight. This was all done for about 1/3 the cost of a set of drawers. If I had 100 small items in the back to organize, drawers would certainly make sense, but as my boot storage is for a small number of larger items, they're easily managed like this.
# Prado 150 third-row seat removal, Prado 150 rear storage, 4WD drawers alternative.

